Ground combat during the Second World War almost exclusively employed manoeuvre-based tactics and strategy, as opposed to stationary, fixed-positional warfare. While gunpowder and artillery had largely invalidated fixed fortifications from the Late Middle Ages onwards, intensive combat did occasionally occur in European areas with bunkers, blockhouses and other positional fighting strongholds during WW2.
Many of these fixed fighting positions were extensive and sophisticated, such as the well-known French Maginot Line, and the German Atlantic Wall which was constructed to prevent an Allied invasion of the European continent from the UK. Not quite as well recognised, but still of vital importance to the German war effort was the Siegfried Line, known to the Germans as the Westwall.
Running approximately parallel to the Maginot Line, construction of the Westwall commenced in 1936. Early German successes in the West saw minimal effort expended on construction and improvements until 1944, when the breaching of the Atlantic Wall with the successful invasion of Normandy provided an urgent impetus to upgrade these fortifications which directly guarded the western German frontier.
While the Westwall had many bunkers constructed for use by machine gunners, it was recognised that certain sections of the fortification needed additional protected firing positions due to localised variances in geography. These positions were installed because it was realised that serious and sustained assaults could occur at these particular points, and additional firepower was needed to repel these attacks.

Accordingly, one standardised design for a heavily-protected, all-round defensive position for machine guns was the 20P7, which was incorporated into many sections of the Westwall.
The 20P7 Design
The Germany approved the design of the 20P7 ‘Panzerturm’ (armored-turret) combat dome in 1934, and the basic design remained the same apart from armor upgrades incorporated from 1936 onwards.
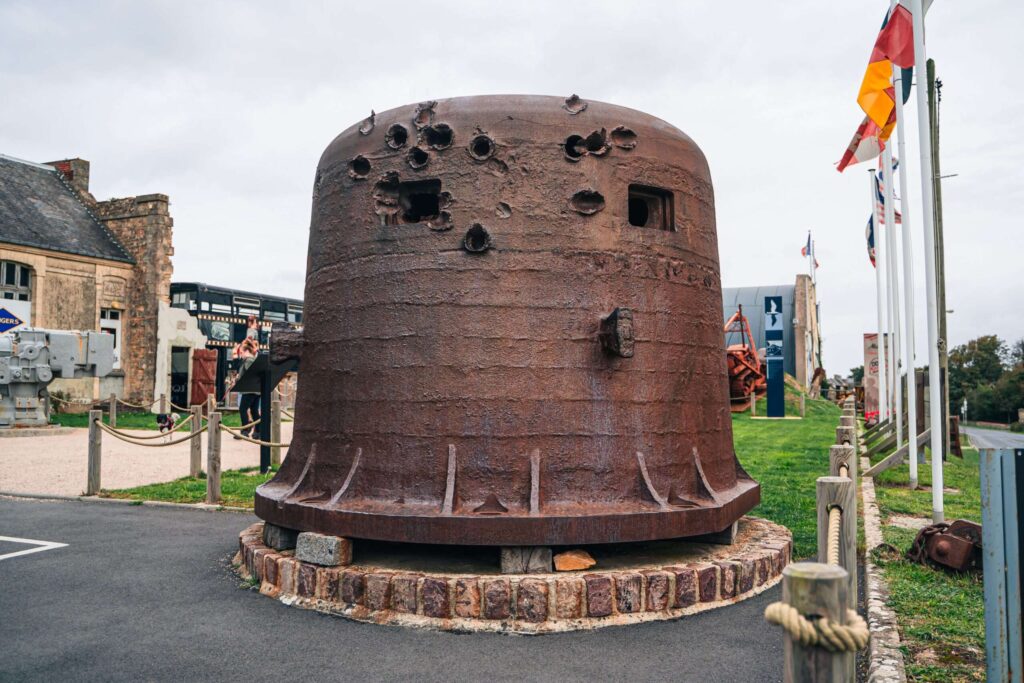
With armored walls of 250-295 mm thick, weighing 56 tons and with an internal diameter of 2.25 metres (7 ft 5 in), the 20P7 provided six equally-spaced protected firing positions for a machine gun around its circumference, though standard practice saw only two of these positions being used at a time.

It was constructed from extremely thick chrome molybdenum steel, and partially buried into a concrete base.
Mounted on top of major bunker fortifications in especially vulnerable positions, one firing position directly covered the most likely enemy approach route, while the second position was utilised to cover the entrance to the major position the combat dome was protecting.
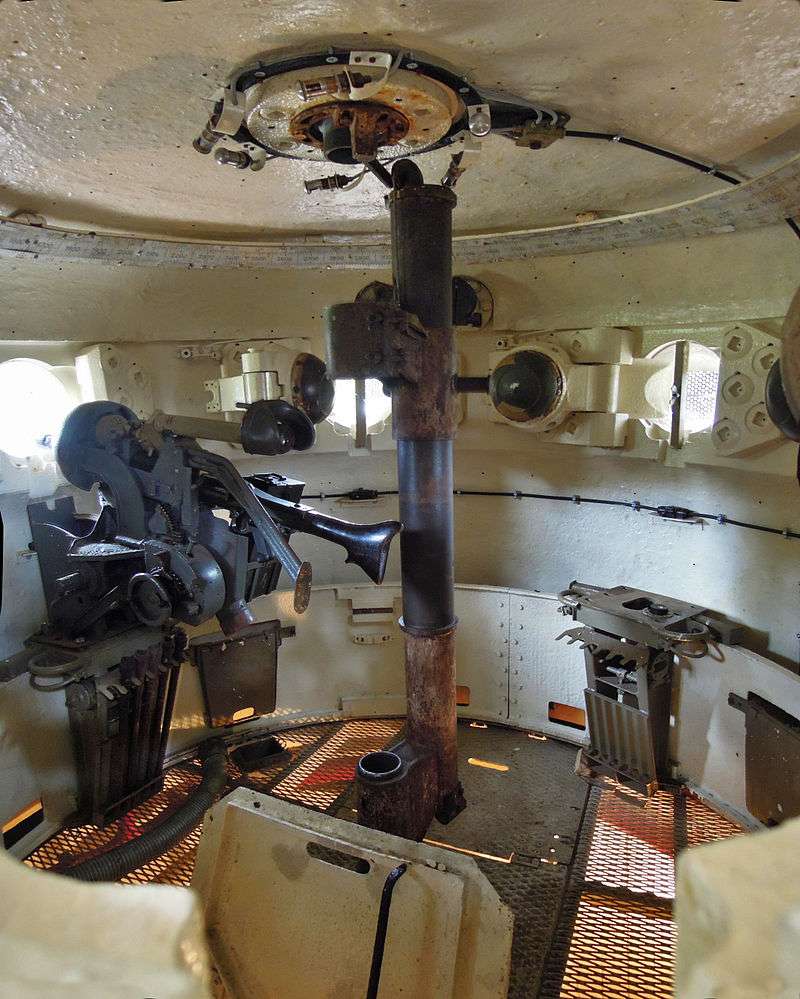
A circular protractor ring was installed just under the roof of the dome, which enabled the crew of each machine gun to more accurately direct the fire of their weapons. On the roof of the dome surrounding the commander’s periscope mount, six coloured wedge segments were painted, each corresponding to one of the individual firing positions. This was provided to help with command and control, and situational awareness during the stress of intensive combat action.

The six firing apertures were provided with a ball mount with two ports – one to accommodate the barrel of the MG 34 machine gun, and the other to allow employment of the accompanying Pz.ZF1 optical sight. Equidistant between each firing position was an aperture for a periscope which allowed a crew member to provide observation of the foreground in front of each firing position.
For overall command and control, the dome commander was provided with a Pz. Rbl.F. 5A retractable rotating periscope, and his central command position had a telephone connecting back to the main bunker position.
All machine gun mounts, external periscope mounts and entrance positions were sealed against the possibility of gas attack, and ventilation fans and lighting enabled the combat crew of the dome to fight with reasonable efficiency in what was considered the cramped and poorly-lit interior of the fighting position.
The MG 34 machine gun used in the 20P7 was chambered in 7.92 x 57 mm, and during its introduction to the German Army in 1936 was considered one of the most sophisticated weapons of its time, and the first real general purpose machine gun (GPMG) ever produced.
The MG 34 had a firing rate of up to 900 rounds per minute, and an effective combat range of up to 2000 metres, though while mounted in the combat dome it was utilised to about 1700 metres.
A sophisticated firing mount was provided in the 20P7, securely fastening the gun within the ball mount while also providing mounting surfaces for the accompanying optical sight and ammunition cases, as well as an integral chute to facilitate the disposal of empty cartridge cases.
The gun could be slid to the other ports on the dome to change directions of fire. It and its ball mount plugged the existing gaps to maintain protection. Any ports that weren’t in use were sealed over with hinged plugs.

While the manufacturing complexity of the MG 34 eventually saw it replaced by the simpler (and faster-firing) MG 42 in general use, it was amongst the first air-cooled machine guns designed for use in the sustained firing role, and as such was designed with a quick-change barrel.
When employed in the 20P7, the firing position for each machine gun was provided with a rack, which was used to store hot barrels after changing.
This racking system allowed hot barrels to gradually cool (helped by air flow from the ventilation fans, which also removed the powder smoke generated by sustained firing) and then be re-employed when necessary.
This method of rotation allowed each barrel to reach its intended service life expectancy of 6,000 rounds, and allowed sustained fire in intensive combat scenarios.

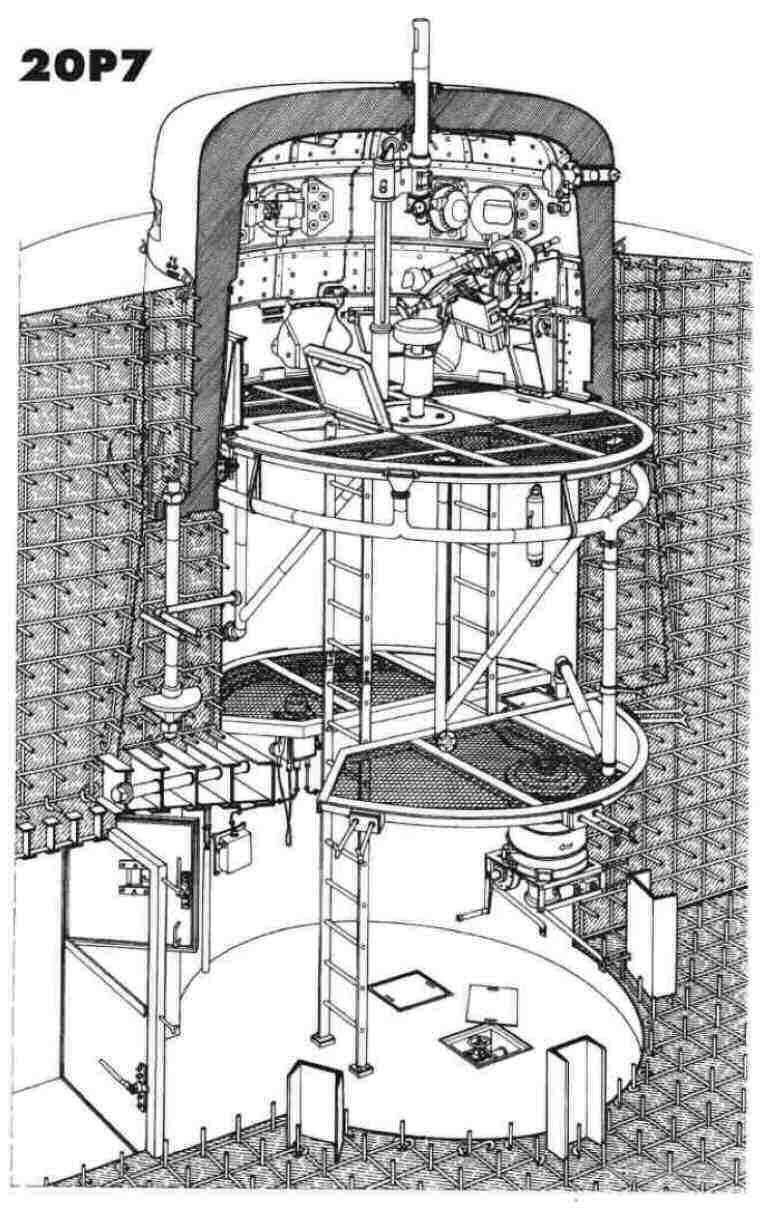
The 20P7 was divided into two sections, the upper fighting chamber and a support section directly below this.
The crew of a 20P7 was usually around 10 men, and two gun teams, the commander and a couple of observers for the external periscopes normally occupied the fighting chamber. The remainder of the dome crew served in the lower chamber, where they checked and prepared ammunition cases, delivered them to the fighting chamber and were on standby to replace any crew member who became combat ineffective for any reason.
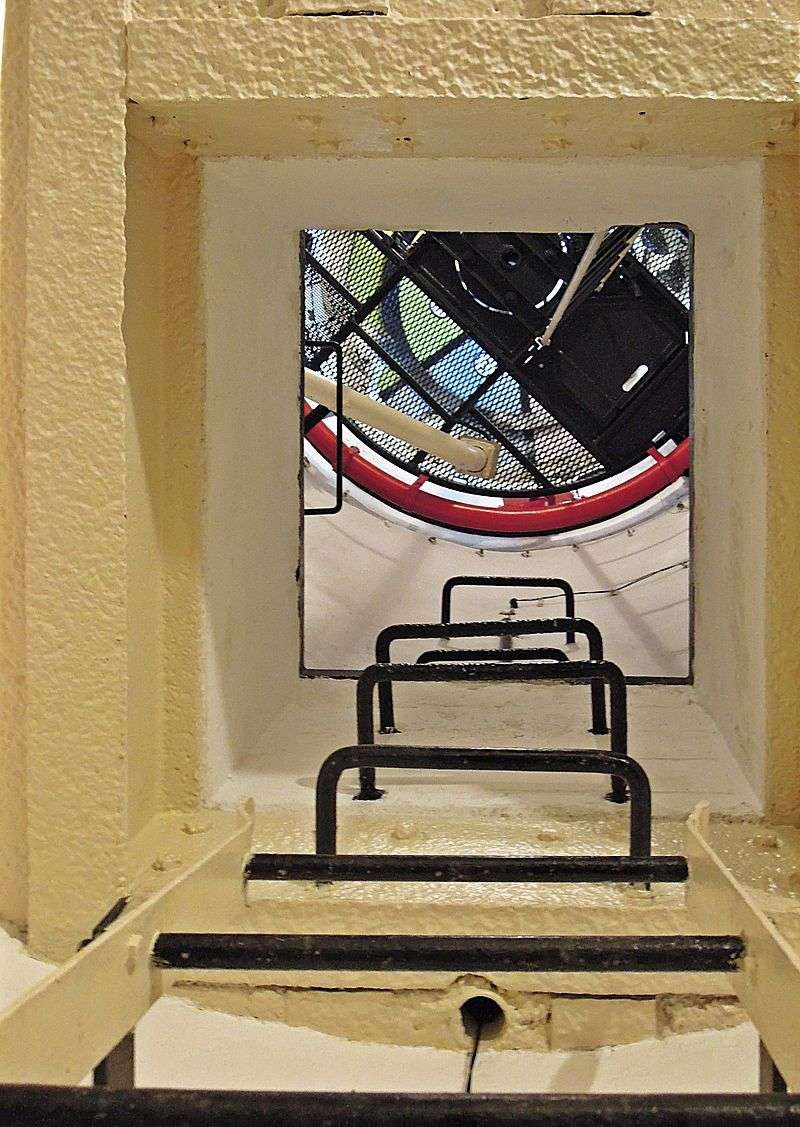
The lower chamber also housed the ventilation fans, the flexible chutes enabling expended cartridge cases to be removed from the fighting chamber, and electrical wiring for lighting and communication purposes.
Combat Usage
The relatively quick breaching of the Atlantic Wall during the Normandy invasion mostly invalidated the use of the 20P7 and its derivatives in this location, as the majority were employed at the more extensive fortifications found in the Calais region of the French coast, where the Germans had expected the actual invasion to eventuate.
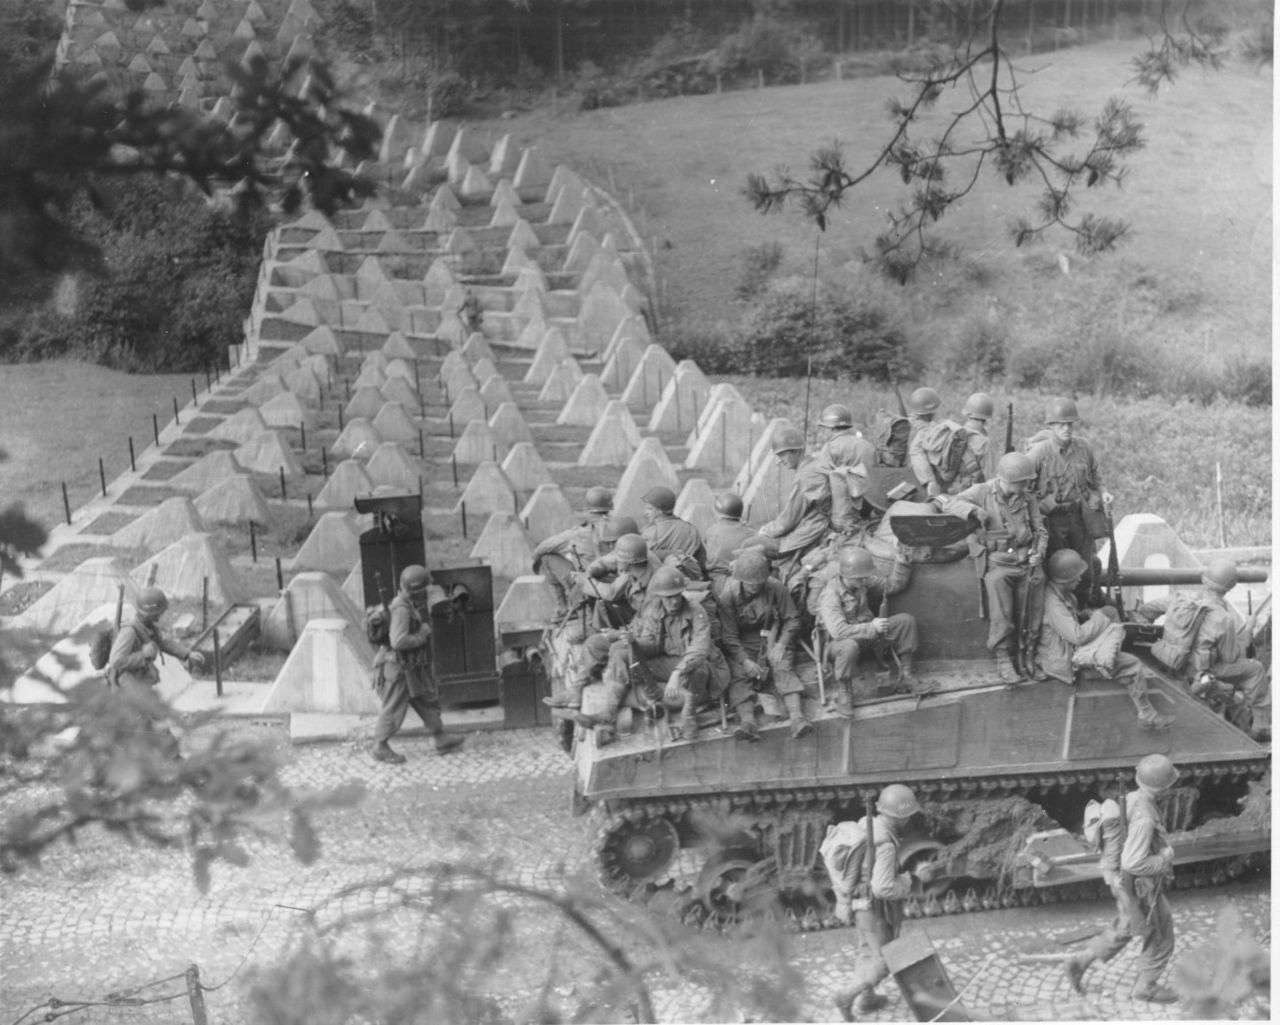
Following the breakout from the Normandy beach heads, the combat in the Western theatre was of rapid manoeuvre warfare until the Allies were in a position to commence assaults on the Westwall and Germany proper from late 1944 onwards. These attacks on the Westwall led to some of the bloodiest fighting of the Western European Theatre of Operations, with very heavy casualties on both sides.


It was during the savage fighting at the Battle of Hurtgen Forest from September-December 1944 that the 20P7 dome and other fixed fortifications were of most use to the German Army. The Westwall ran right through this heavily-timbered area, and the German defenders were able to effectively camouflage fixed fortifications such as 20P7s, and the cover provided by the dense foliage prevented the Allies from effectively employing their distinct advantages in firepower and mobility, including air power.
The end result was horrendous casualties suffered by both sides, and the battle is considered a defensive victory for the Germans. Combat operations by both sides only ceased after the commencement of the German Ardennes Offensive on the 16th December 1944.

It was this period where the combat dome and other fixed fortifications were able to be employed to their fullest effect, as the terrain nullified the use of armored vehicles and other heavy weapon systems in support of the Allies. The 20P7 and other bunkers were well supported by roving mortar and machine gun teams, with additional support from field artillery in the vicinity of the Westwall fortifications.
Having local knowledge of the area combined with the ability to pre-register all firing target areas, the Germans were able to inflict sickening losses on American infantry formations, and any return fire was often absorbed by the thick armor of the 20P7 dome. Any incoming fire that impacted on the bunkers had little effect on the crews manning the quick-firing MG 34s, who were mostly able to operate their weapons with impunity.

While fixed fortifications were in vogue for a short time during the 1930s, advances in armor-piercing munitions rapidly invalidated any protection offered by armored cupolas and bunkers in the latter part of the Second World War. It was only during the early fighting at the Westwall in late 1944 that these fortifications enjoyed any real success, and this was due mainly to local geographic features that allowed the 20P7 dome to be effectively utilised.
However, when the fighting transitioned back into rapid manoeuvre warfare any bunker or fortress became an expensive and pointless failure. Perhaps it is best to leave the last word to one of the great practitioners of mobile warfare, General George S. Patton: ‘Fixed fortifications are monuments to man’s stupidity’.